Quick Weeknight Salted Pepperoni Chips
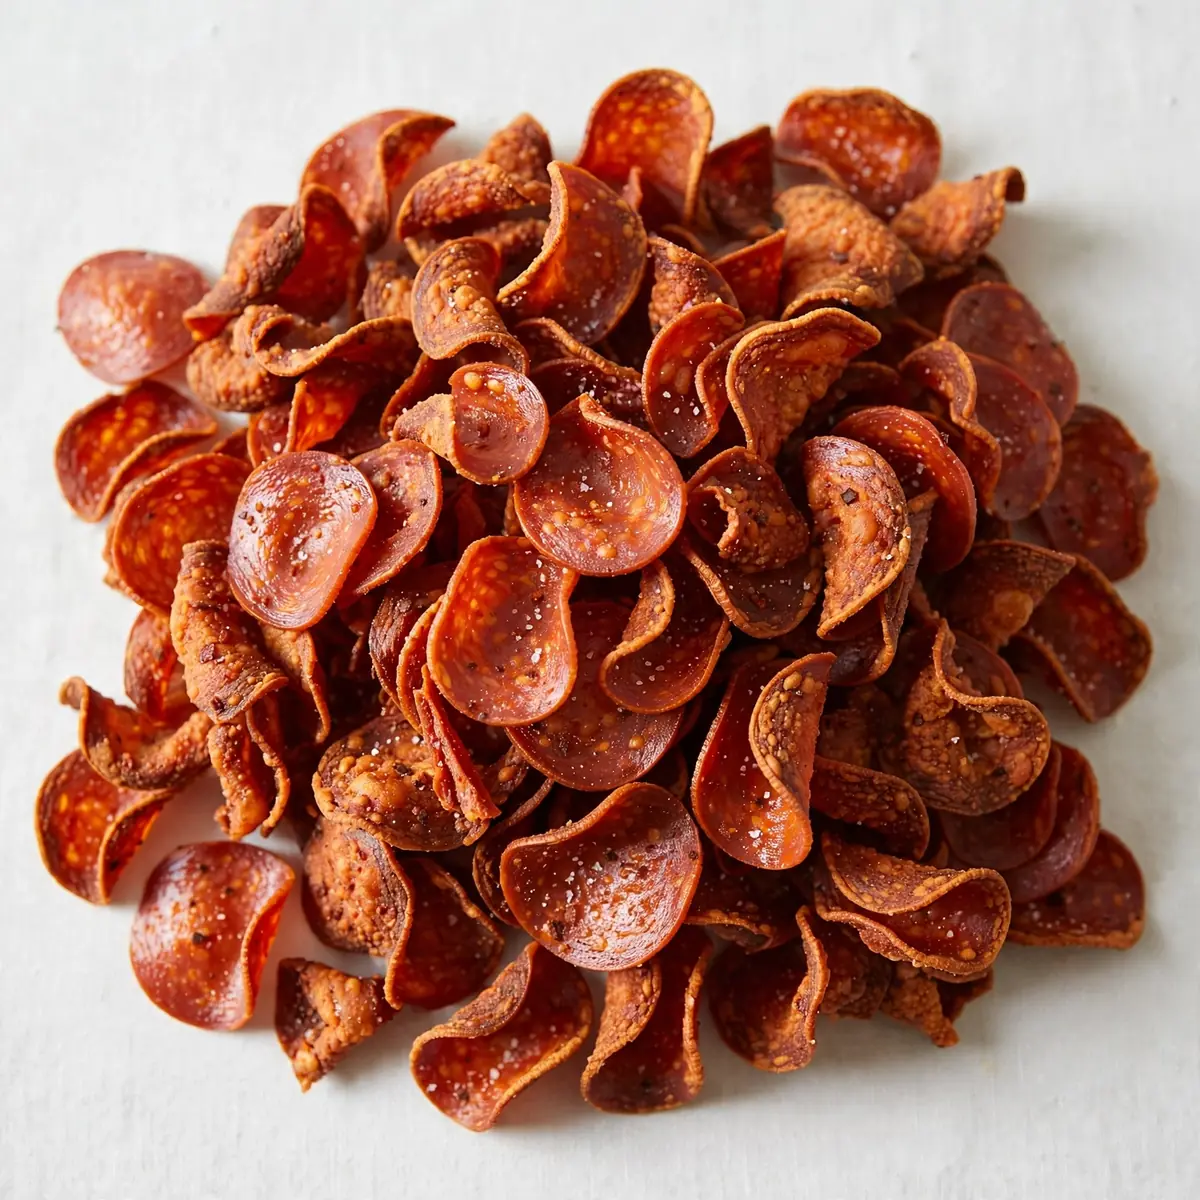
On frantic weeknights, when the clock is running down and everyone’s hungry, I rely on one secret weapon: a pan, some beef pepperoni, and five minutes. This isn’t a recipe for a snack; it’s a dinner strategy that has saved my sanity more times than I can count.
Recipe Overview
- Prep Time: 5 minutes
- Cook Time: 10 minutes
- Total Time: 15 minutes
- Servings: 4 as a main, 6 as a side
- Difficulty: Easy
Why You’ll Love This Salted Pepperoni Chips (Beef Pepperoni)
- Blistering Speed: From fridge to table in under 20 minutes, this is the ultimate solution for those nights when you blink and dinner time has arrived.
- Minimal Washing Up: One pan, one spatula, and a cutting board. I’ve been making this for over 5 years, and it never disappoints when I want to avoid a mountain of dirty dishes.
- Naturally Low-Carb & Keto-Friendly: These crispy chips are pure protein and fat, making them a perfect fit for low-carb lifestyles without any complicated swaps.
- Make-Ahead Magic: Cook a double batch on Sunday, and you’ve got a crunchy topping for salads, soups, or a quick protein boost all week long.
- Kid-Approved Texture: The salty, crispy crunch is irresistible. My children call them “meat crisps” and ask for them by name.
Ingredients You’ll Need
- 250g beef pepperoni, sliced into 3mm rounds
- 1 tablespoon olive oil
- ½ teaspoon flaky sea salt
- ¼ teaspoon black pepper
- Optional: 1 teaspoon dried oregano or rosemary
Tip: For the best texture, buy whole beef pepperoni sticks and slice them yourself. Pre-sliced pepperoni is often too thin and can burn before crisping properly. Aim for slices about the thickness of a £1 coin.
How to Make Salted Pepperoni Chips (Beef Pepperoni)
- Prepare the pan: Place a large frying pan over medium-high heat. Add the olive oil and swirl to coat the base. You want the oil shimmering but not smoking — you’ll see tiny ripples on the surface.
- Lay the slices: Arrange the beef pepperoni slices in a single layer in the hot pan. Do not overlap them; leave a little space between each slice. You’ll hear a gentle sizzle as they hit the pan — that’s the sound of success.
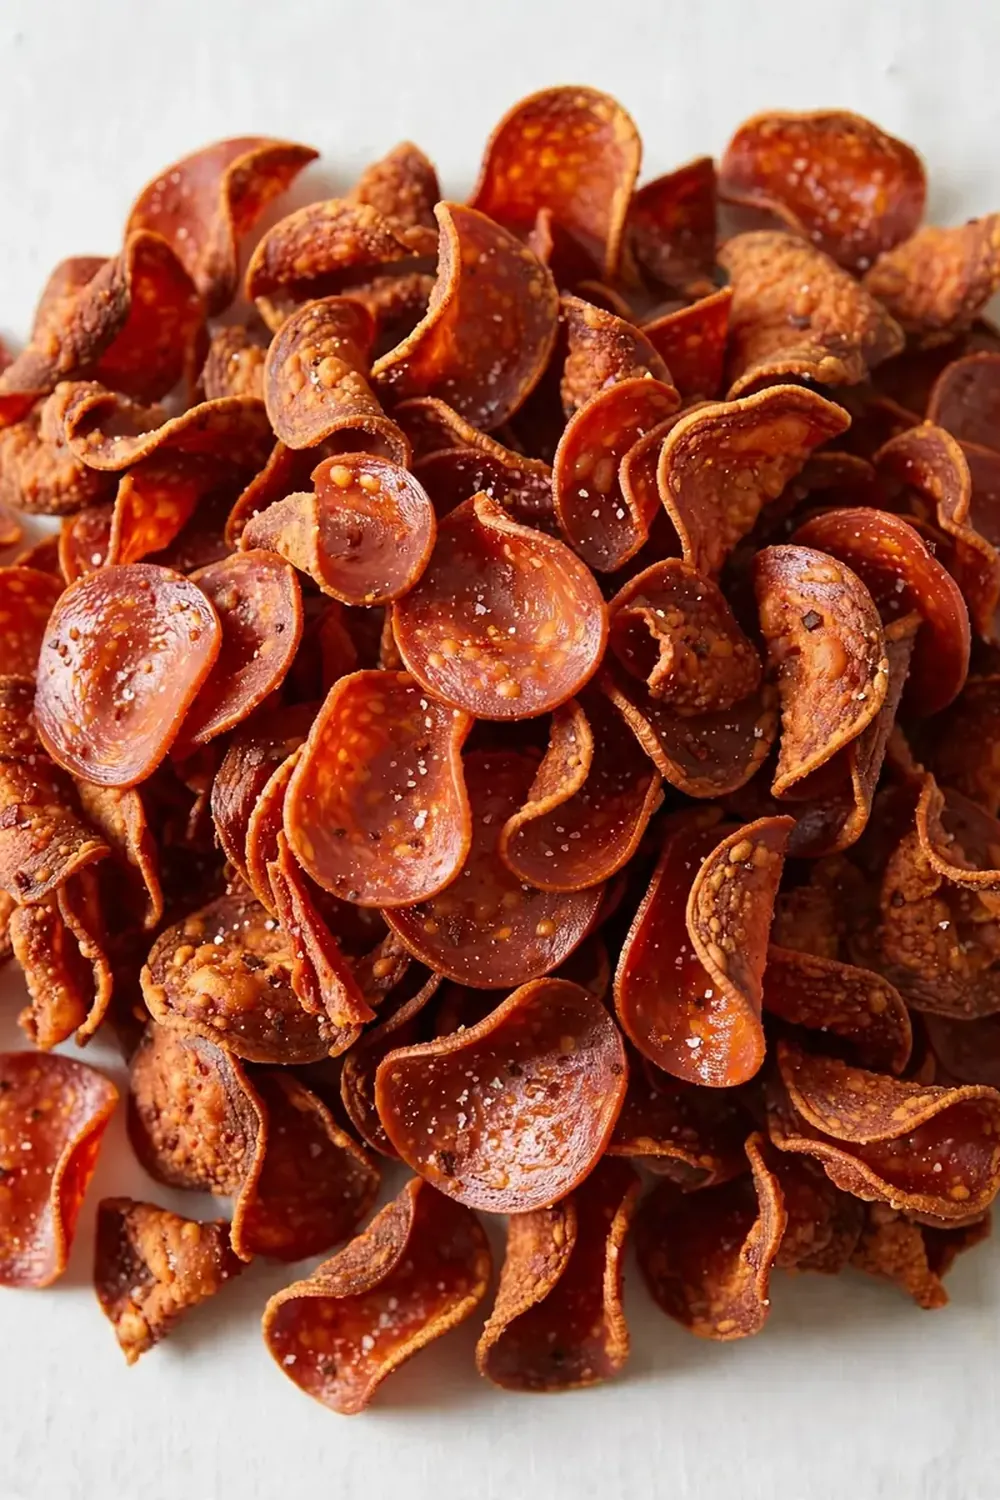
- First side: Cook for 3-4 minutes without moving them. Watch the edges: they will start to curl upwards and darken to a deep mahogany brown. The fat will render out, creating a small pool around each slice.
- Flip and season: Using tongs, flip each slice. The cooked side should be a rich reddish-brown with darker edges. Sprinkle immediately with the flaky sea salt, black pepper, and dried herbs if using. The salt will stick to the rendered fat.
- Second side: Cook for another 2-3 minutes. The slices will become firmer and start to feel rigid when you nudge them with the spatula. The colour will deepen to a dark bronze, and the kitchen will smell like a pizzeria.
- Drain and rest: Transfer the crispy chips to a plate lined with kitchen paper. Let them rest for 2 minutes — they will continue to crisp up as they cool. Do not skip this step, or they may be chewy rather than crunchy.
Tips From My Kitchen
- Work in batches: I cannot stress this enough. If you crowd the pan, the pepperoni will steam rather than fry, leaving you with floppy, greasy discs. Cook in two or three batches if necessary. It only adds a few minutes, and the texture difference is night and day.
- Control the heat: Medium-high is your sweet spot. Too low, and the fat renders slowly, making the chips tough. Too high, and the outside burns before the inside crisps. If you see black smoke, lower the heat immediately.
- Pat them dry first: If your pepperoni feels damp or oily from the packet, pat the slices dry with kitchen paper before cooking. This removes excess moisture and helps them crisp up faster and more evenly.
- Save the rendered fat: Don’t pour that golden fat down the sink! Strain it into a small jar and use it to fry eggs or roast vegetables later in the week. It adds a lovely savoury depth to any dish.
- Double for meal prep: I make this at least once a week — it’s become a family favourite. I often cook a double batch and store the cooled chips in an airtight container. They stay crunchy for up to 5 days, perfect for tossing into salads or scattering over soups.
Equipment You’ll Need
- Large frying pan or skillet (non-stick works best)
- Sharp knife and cutting board
- Mixing bowls (for holding sliced pepperoni)
- Wooden spoon or spatula (for flipping)
- Tongs (easier for flipping delicate slices)
- Kitchen paper for draining
Common Mistakes to Avoid
- Overcrowding the pan: This is the number one error. When slices overlap, they trap steam, which prevents browning and leaves you with chewy, greasy pepperoni. Always cook in a single layer with space between each slice. If your pan is too small, cook in batches — it’s worth the extra minute.
- Wrong temperature: Starting with a cold pan will cause the fat to render slowly, making the chips tough and leathery. Conversely, a pan that’s too hot will burn the outside before the inside crisps. Medium-high heat is ideal. If you’re unsure, test one slice first: it should sizzle immediately upon contact.
- Skipping the rest time: Those two minutes on kitchen paper are crucial. As the chips cool, the residual heat continues to drive off moisture, transforming them from slightly soft to shatteringly crisp. Patience here separates good chips from great ones.
Delicious Variations to Try
- Spicy Version: Add a pinch of cayenne pepper or red pepper flakes along with the salt. For an extra kick, drizzle with a little hot honey (use a honey that is halal-certified, if needed) just before serving.
- Vegetarian/Vegan Option: Use thick slices of firm, smoked tofu or seitan seasoned with smoked paprika, salt, and a drop of liquid smoke. Pan-fry in the same way until golden and crispy.
- Different Protein: Swap beef pepperoni for turkey pepperoni or slices of cooked chicken sausage. The technique remains exactly the same, but you’ll get a different flavour profile — turkey is milder, while chicken sausage adds herb notes.
What to Serve With Salted Pepperoni Chips (Beef Pepperoni)
- As a topping for a crisp green salad with a tangy vinaigrette — try this with our One Pan Cilantro Lime Shrimp Skillet Cauli Rice for a full meal.
- Crumbled over creamy soups like tomato or butternut squash for added crunch.
- Alongside scrambled eggs or an omelette for a quick, high-protein breakfast-for-dinner.
- Stuffed into a warm pitta with lettuce, tomato, and a dollop of tzatziki.
- Served as a crunchy snack with a side of marinated olives and cheese cubes.
Frequently Asked Questions
Can I make these in the oven instead?
Absolutely. Preheat your oven to 180°C (fan) and line a baking tray with baking paper. Arrange the slices in a single layer and bake for 8-10 minutes, flipping halfway through. Keep a close eye on them after 7 minutes, as they can go from golden to burnt very quickly. Oven-baked chips are a great hands-off option when you’re making a larger batch.
How do I store leftovers?
Once the chips have cooled completely, transfer them to an airtight container lined with a piece of kitchen paper. Store at room temperature for up to 5 days. The kitchen paper will absorb any excess moisture, helping the chips stay crunchy. Do not refrigerate them, as the cold will make them soft.
Can I re-crisp them if they go soft?
Yes, and it’s very simple. Spread the softened chips on a baking tray and pop them into a 160°C oven for 3-4 minutes. Alternatively, re-crisp them in a dry frying pan over medium heat for 1-2 minutes, flipping once. They will crisp right back up and taste almost as good as fresh.
Is beef pepperoni the same as regular pepperoni?
Traditional pepperoni is usually made from a blend of pork and beef. Beef pepperoni uses only beef, making it suitable for those who avoid pork for dietary or religious reasons. The flavour is slightly less fatty and a bit more robust, but it crisps up beautifully in exactly the same way.
Can I use this as a topping for other dishes?
Definitely. These chips are brilliant scattered over pasta bakes, stirred into fried rice, or crumbled onto pizza. For a quick weeknight dinner, try them on top of our Quick Beef Enchilada Zucchini Boats For Busy Weeknights for extra crunch. They also make a fantastic garnish for creamy dips or hummus.
Salted Pepperoni Chips (Beef Pepperoni)
Crispy, savory pepperoni chips made by pan-frying beef pepperoni slices until curled and crunchy, then seasoned with flaky sea salt, black pepper, and optional dried herbs.
Ingredients
Method
- Prepare the pan: Place a large frying pan over medium-high heat. Add the olive oil and swirl to coat the base. You want the oil shimmering but not smoking — you'll see tiny ripples on the surface.
- Lay the slices: Arrange the beef pepperoni slices in a single layer in the hot pan. Do not overlap them; leave a little space between each slice. You'll hear a gentle sizzle as they hit the pan — that's the sound of success.
- First side: Cook for 3-4 minutes without moving them. Watch the edges: they will start to curl upwards and darken to a deep mahogany brown. The fat will render out, creating a small pool around each slice.
- Flip and season: Using tongs, flip each slice. The cooked side should be a rich reddish-brown with darker edges. Sprinkle immediately with the flaky sea salt, black pepper, and dried herbs if using. The salt will stick to the rendered fat.
- Second side: Cook for another 2-3 minutes. The slices will become firmer and start to feel rigid when you nudge them with the spatula. The colour will deepen to a dark bronze, and the kitchen will smell like a pizzeria.
- Drain and rest: Transfer the crispy chips to a plate lined with kitchen paper. Let them rest for 2 minutes — they will continue to crisp up as they cool. Do not skip this step, or they may be chewy rather than crunchy.
Notes
Do not skip the resting step on paper towels, as the chips continue to crisp while cooling. Adjust cooking time slightly depending on thickness of slices.
I hope this recipe brings as much ease and joy to your kitchen as it has to mine. If you give it a go, I’d love to hear how it turned out for your family — drop a comment below and let me know your favourite way to serve these crunchy little bites.